1986 Kawasaki KX500 restoration
Author: Kane Sedonja Date Posted:20 June 2023
Ahh the 80’s, A time of big hair, loud clothes, wild music and of course dirt bike design. This was a wild period for off road manufacturers and what they were trying to develop and invent to go faster and handle better than the previous generation. It was a time of immense trial and error and the amazing works bike that the top factory team ran. Looking back on them know they seem like outdated machines compared to a modern motocross bike. But they will always look and be individuals, something that modern rules and requirements have left us wanting in the modern generation of bikes.
On that note let’s have a look at this 1986 KX500 that the team at Garage 11 have managed to restore back to its former glory. This bike was bought by Garage 11 in early 2019 and looked like it had been sitting at the bottom of a dam for the last 20 odd years. There was a whole lot of it missing and what was there was in seriously bad shape.

These 80s bikes are always a challenge to restore, information is starting to get a little thin on the ground and the nature of bikes being a one-year development means that a lot of parts have not been picked up by the aftermarket sector and new old stock stuff is always hard to find.
We started by striping down what we had so we could assess what we could work with and what we needed to start finding. First off the frame needs to get sand blasted so it can be assessed for straight and to see what lies beneath the paint. Luckily the frame was in really good shape, all be it a few small threads and bits that need repair, before it went on to be coated to a factory silver colour.
While the frame was away we noticed the front forks where in bad shape so they had to be sent away to be re chromed and surface ground back to spec. We then re finished the lower tubes and hydro blasted them to give us a factory like finish. The internals where serviced and all new bushes and seals where used.
Triple clamps where hydro blasted and cleaned up and new bolts and bearings fitted. By this time the frame was back so we could start fitting some of these parts to the bike.
Next up was the engine. The bottom end of this engine and gear box was in pretty good shape, just needed the all the cases and cover Cerakoted gloss black and new bearings and seals fitted along with a new rod and bearings. The top end had been bored to its last over size and we didn’t want to machine the head to suit, so we found the last sleave available and had that installed and machined to oem spec. A new piston and rings were fitted and then it was time to assemble to overly complex power valve system and install it to the bottom end.
As we are going, we are always looking back to parts fiches and photos to see what oem cable management stuff we can order and what is missing in general. When we got the bike, it had no air filter box or transfer boot on it so we needed to find one of those. We managed to get one from a local wrecker which was a miracle unto itself. It wasn’t in the best of shape, but we managed to polish it back and coat it in a special plastic paint to help give it a uniform finish. The transfer boot we hydro blasted and that came up well. As for the air filter cage, the only one we could get a hold of was a 3D printed replica out of the US. Its amazing what is available now with new tech, and it’s amazing to see the super talented independent people who are picking up remaking these parts.

Once we had the engine back in it was time to get to work on the amazing “UNI-TRACK” rear suspension system. Now to be fair I wasn’t around when this was a thing, but form what I have heard it wasn’t the most amazing suspension system to ride on. 36 years later its still no good to restore. We managed to find a host of bushes and parts we needed to get the link and the shock back to what it was meant to be. Once again, we used photos and other references to get the colours as close as we could when it cam to all the components and there fasteners. The shock spring was re coated and the body of the shock was Cerakoted to match what we believe to be the oem colours.
After that we got into restoring the swing arm, this is never a fun process and no matter what you do will always yield issues and problems. Once we got it as close as we could to original finish it was anodised in what they call neutral.
The hubs where stripped and Cerakoted gloss black and new spokes and rims where then laced to them, wheels are generally straight forward. New bearings, re zinc the axles and then bang! It’s a roller again. This is always an exciting part, as a mechanic and restorer I always take pleasure is seeing smaller assemblies come together to perform a common task, even if it is as simple as a dirt bike that has functioning suspension and wheels.
Next up was the tank……. Where do I start with this one. The tank that came on it was some horrible cracked oversized enduro tank that needed to go. So, we found a second hand one from Texas that cost a fortune and ended up being no good due to stripped threads. We then managed to find a second hand one locally. 16 hours later and we were struggling to restore it as we wanted it. We had a good friend of ours that is a master automotive painted, and he jumped in a restored it to what you see now. It really came up amazing.
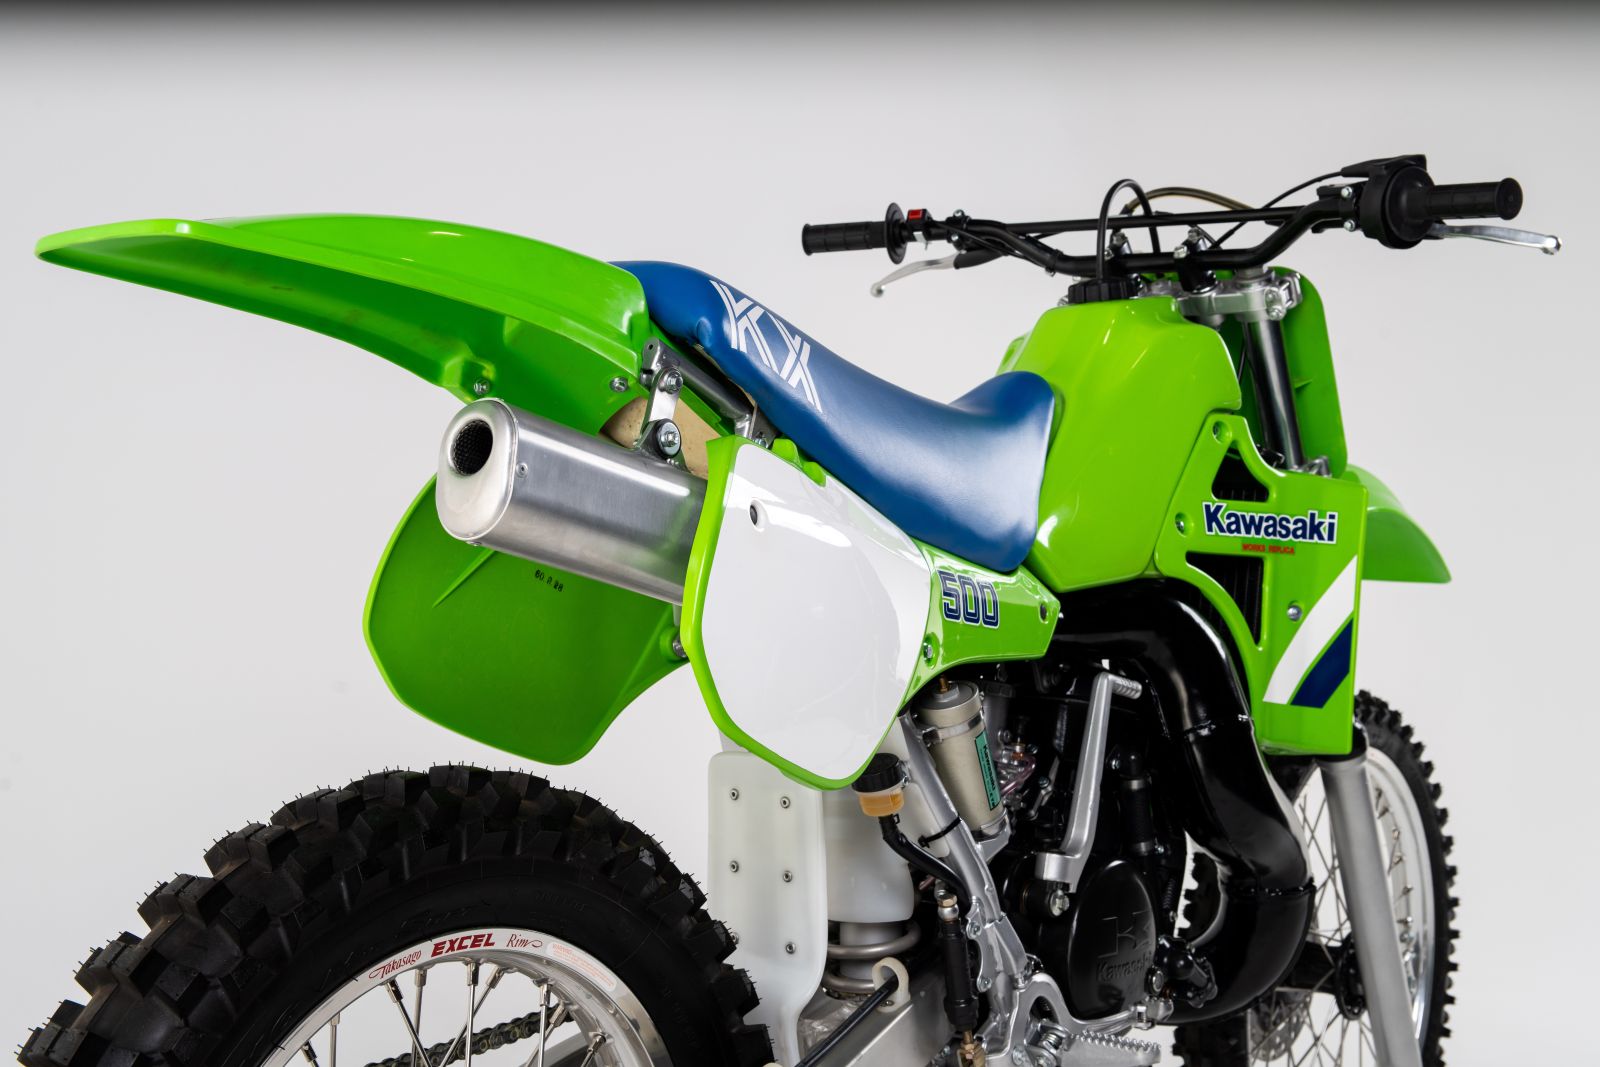
We used aftermarket front and rear guards for it which was good that they where available. As there are some really ordinary vacuum formed replicas out there that just don’t work. The worst part of it is there is no one that makes good replica side panels, this was the part that was starting to worry us. Then boom a set of new old stock side and radiator shrouds popped up in France. We closed our eyes and paid the eye watering bill and they where on there way to us. When they arrived it was almost impossible to bring ourselves to open the factory Kawasaki bags that they where in. But once we did and we fitted them to the bike it was love at first sight. This was one of those sit back and stare moments.
After all the dribbling was over there was still the matter of finding and exhaust for it. At this point the only pipe that would look right on it was going to be original… “sigh” So we began our hunt and managed to find one on the east coast of the US. It was in really good shape, so we had it sent to a buddy of ours Pete in California and he shipped it over. It then went to Paul at Prime Pipe Works here in Victoria to have it restored to near new. He is a wizard with all things pipes and mufflers.
It was then time to fire it, now I don’t know how many of you can quite understand how much compression an 86 KX500 has, but it is brutal, really brutal. As a comparison a mid-90s CR500 has a compression ratio of 6.8:1 this monster has a compression ratio of 8.4:1. For those who have started one of these then you know what I mean. Once it fired it had that amazing big bore two stroke idle, it’s something that can’t be explained but is perfection.
That’s it in a nutshell, I would really like to thank everyone who helped bring this together. Paul at Prime Pipe Works, Marshall Smith at Garage 11, Dao Radivo, Max Peters, Rob kollosche, Pete Jesina, MTO repairs, SP moto seats, Melbourne anodising, Marty at VMX Decals/Stickers, and the amazing guys at CMSNL.